NES Text Passwords: Demo NES ROM

July 15, 2021

In preparation for an upcoming video, I decided to get some experience with 6502 assembler and NES development. I built a ROM that will take a 24 character password like in Metroid or Kid Icarus and change it to either use Space or - characters where possible. It kinda simulates how spaces were a valid character in Metroid passwords whose bit value of %111111 was the same as -, but had the additional behavior of setting the prior character’s lower bits to on. Download the ROM here and try it out in you own emulator!

In the example ROM, I use the exclamation point ! character instead of the - to make the change more visually interesting and because exclamation points are cool. ! in Kid Icarus has the same bit value as - in Metroid.

Process

Code

References

Changelog

  • 2021-07-15: Initial post.
  • 2021-07-16: ROM updated to better support Nestopia. It didn’t like the palette definition for some reason. Thanks Tyrel!

NES Passwords: Notebook-based save game storage

July 11, 2021

Topaz the Rabbit talks about a big problem with big video games for early consoles – how do you make it so you don’t have to beat the whole thing in one sitting? A video take on an earlier post, The Game State That Lasted Seven Days.

Thanks to Tyrel Souza, @ijimkoz, and @tiegz (ティグさん) for their helpful feedback, and to everyone else who took the time to watch it while it was in production!

I realized I messed up the bit diagrams for the Metroid and Kid Icarus passwords in the video. Oops! The corrected Metroid bit diagram is in the Spaces in Metroid passwords video.

References

Code

Music & SFX

Changelog

  • 2021-07-11: Initial post.
  • 2021-08-04: Note about error in video and link to video w/ correction.
  • 2023-07-13: Moved to MakerTube

Amiga Copper Demo and Module Music Video

June 8, 2021

While researching a future post about the Copper functionality of the Amiga’s Agnus custom chip, I decided to really dig in and figure out how the Copper worked and how you would write some of the bare metal custom chip code. The process of making this video made me realize I need to do a few other posts before I can do one about the Copper, as there are a lot of prerequisites to understand it, at least at the level I am now able to understand it at. I also wanted to showcase a lot of the kind of music the Amiga was known for, module music made on music trackers. So here’s a nice, long video, with a real Amiga Copper demo (the kind I know I would make made back in the day, cartoon characters included, if I had these skills in the 90s!) and a lot of really great music to listen to.

How was it made?

  • The animation was done in Krita on Android. I used a pixel brush for the in-Amiga emulation to ensure all the pixels lined up with the 320x256 screen I was working on. The rest was done normally with regular brushes.
  • I used GIMP to convert the images destined for the Amiga into 16 color PNGs. The trick to keeping a consistent palette across all of the images was:
    • Convert one image to a 16 color image.
    • Swap around the colors in the index so that the color index to knock out via the Copper effect was index 0.
    • Create new layers to physically swap the color pixels in the image. You have the ability to select all of the pixels of a particular index, and then you can fill a new layer on top of the original to change the color.
    • After you’ve swapped one of these around, you can convert the remaining ones using the first image’s palette.
  • I used Personal Paint to convert the images from PNGs to IFFs.
  • I loaded all of the images, one by one, into memory banks in AMOS Professional. I loaded the first image again into a separate memory bank, but one that preserved screen resolution and palette, to simplify app initialization. I flip through these memory banks to animate Topaz, as the IFF animation tools in AMOS Pro seem a bit broken.
  • I wrote a lot of AMOS BASIC, which I hadn’t done since 1997 1998, and I referenced a lot of Amiga Copper, bitplane (Denise’s territory), and DMA examples. These ones helped out the most:
  • I ran all of this in FS-UAE, and captured it with vokoscreenNG.
  • I edited the video with Kdenlive.
  • I converted the music mod files using ffmpeg. It was the fastest way to convert a large number of modules at once for evaluation and movie use. I hope they sound OK!

Code & Assets

I put the AMOS code – the bundled .amos file, the .abk with the animation frames, and a .txt file with the code in plaintext – up on GitHub. The code is released under an MIT license, but the artwork is copyright by me, all rights reserved. I’m no expert at Copper coding, so if there are improvements (besides rewriting it in assembler. Learning 68K assembler is on my list of things to do for R1KR), I’d love to hear them! For it to run fast enough, I emulated a 68030 with JIT enabled in FS-UAE.

Music

All the music is either Public Domain or Creative Commons Attribution 3.0, and it all comes from The Mod Archive. Check out all of these artists’ awesome work! There’s way more there than I could put into this 90 minute video.

  • The beat

    • Andreas Viklund
    • CC-BY 3.0
  • Frostbiter

    • Pip Malt
    • CC-BY 3.0
  • Super Dance

    • Katie Cadet
    • Public Domain
  • NeuroTransfer

    • JAM
    • Public Domain
  • Momentary Meditation

    • K. Jose
    • CC-BY 3.0
  • Computer Adventures Of Drozerix

    • Drozerix
    • Public Domain
  • Filterness

    • Katie Cadet
    • Public Domain
  • Additional Discomfort

    • Pip Malt
    • CC-BY 3.0
  • Gate 303 - demomix

    • Andreas Viklund
    • CC-BY 3.0
  • the Epic Chip

    • M0ns0n/Drozerix
    • Public Domain
  • Pretty Big Stench

    • Pip Malt
    • CC-BY 3.0
  • Harmony-PartyEdit

    • Andreas Viklund
    • CC-BY 3.0
  • Digital Rendezvous

    • Drozerix
    • Public Domain
  • Simple Chip Tune

    • JAM
    • Public Domain
  • Dangerous Radiation

    • JAM

    • Public Domain

  • Sound Effects

    All sound effects, except for Topaz’s “heh” which was all me, come from Freesound, and are also either Public Domain or Creative Commons Attribution 3.0.

    Changelog

    Self-Portrait May 2021

    May 19, 2021

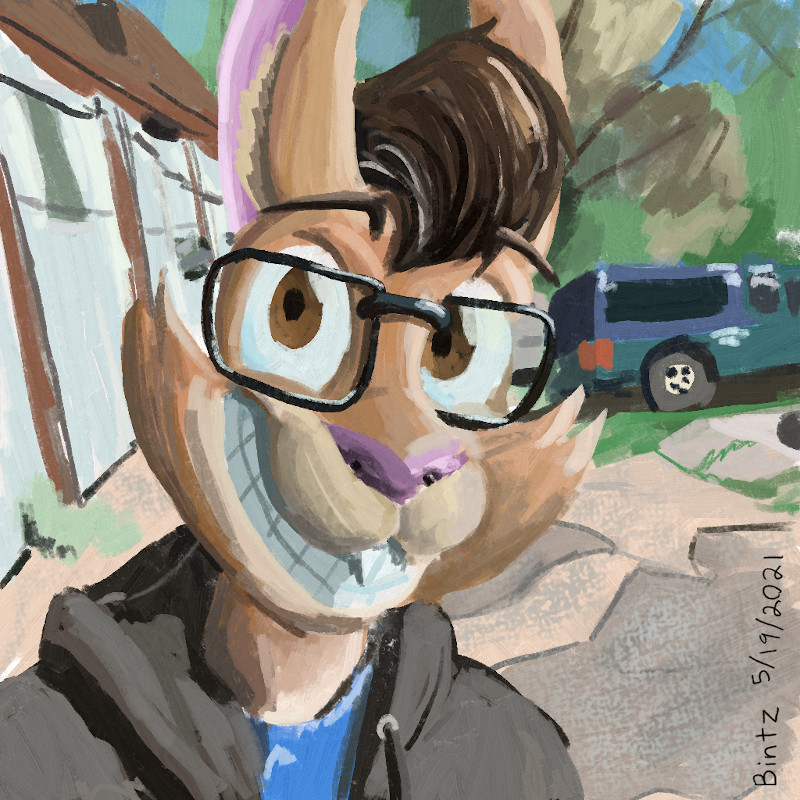
    I painted up a new Topaz self-portait for May 2021!

    I’m still looking for the tools in Krita I enjoy the most. This one came together a lot faster than the prior one. I think I’m getting better at this.

    The NES: Playing Volleyball with Three of Your Friends

    May 17, 2021

    Playing a video game with a friend is great. You get to have fun and bond while you stop the aliens together or compete for the high score. But what if you have more than one friend? Weird to think about, right? And what if you wanted to play a bodacious new volleyball video game with more than one friend at the same time. Well, if you were gaming in the early 90s, this required some creative hardware and software tricks to make happen.

    My first Nintendo console was a Family Computer we got at a flea market. That had two controllers hard-wired into the console. Eventually that stopped working and, for some holiday, I got the NES Sports Pack, which included controllers and a multicart with Super Spike V’Ball and a soccer game, World Cup Soccer, that was actually part of a crazy huge game world in Japan? I did always wonder why the soccer game looked a lot like like River City Ransom

    Anyway, the coolest thing it came with was the NES Satellite, which allows you to use four (!) controllers instead of the normal two. It’s an infrared version of the wired Four Score multitap, so you put the 6 D-cell powered Satellite transmitter with the controllers plugged into it about 10 or 15 feet away from the NES and the signal is transmitted via infrared. I had an electronics kit when I was very young, and one of the experiments was turning a flashlight, photosensor, and speaker into an alarm, so I kinda knew how the infrared part worked. But I always wondered how the heck the four-controllers-instead-of-two thing worked.
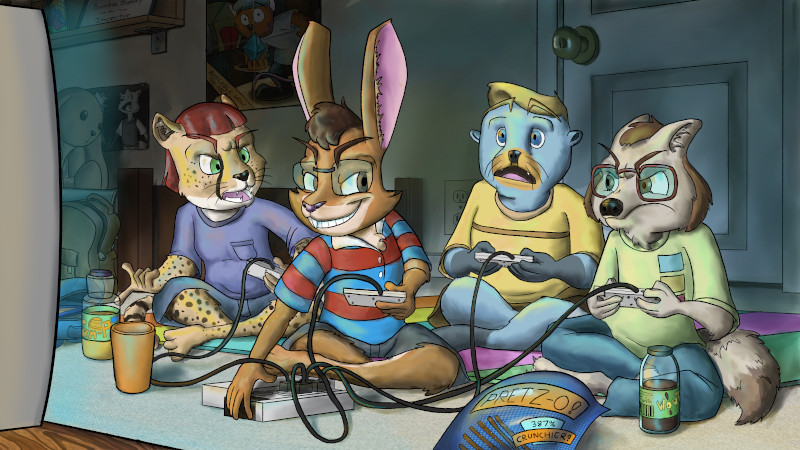
    Topaz puts his hand in front of an NES Satellite and his three friends are upset.

    Only block the infrared light on the Satellite if you're winning by a lot, or losing by a lot.

    The NES and its controllers communicate, much like how the C128 and 1571 floppy drives communicate, with a shift register between the controller and console. When you want to know the state of the first controller, you tell that controller to start reading that state of all of the buttons into the shift register of the controller by writing a 1 to a specific memory location in the NES, $4016. This is like lighting up a “START READING” sign inside the controller. Then, when you’re ready for the data, you tell the controller to stop capturing by writing a 0, which lights up a “Pack up your current state now!” sign. Imagine a set of 8 suitcases, one for each button, all in a line on the baggage carousel, and they’re being filled with the state of each button on the controller:
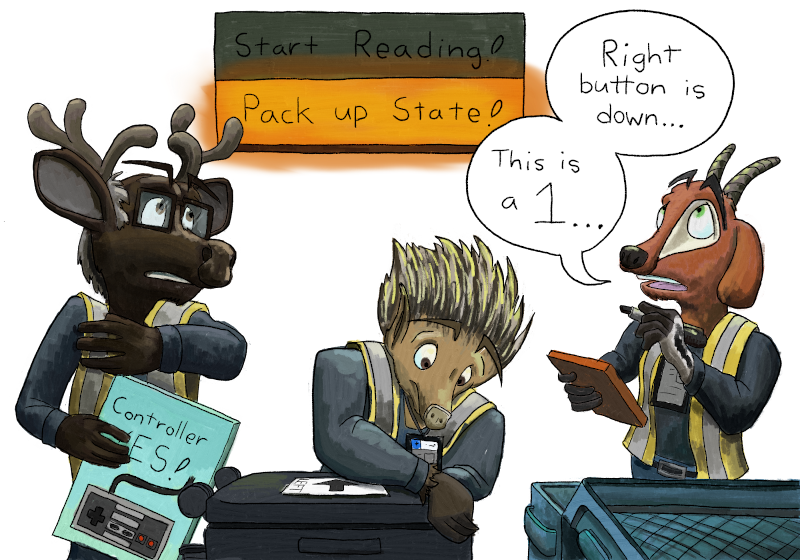
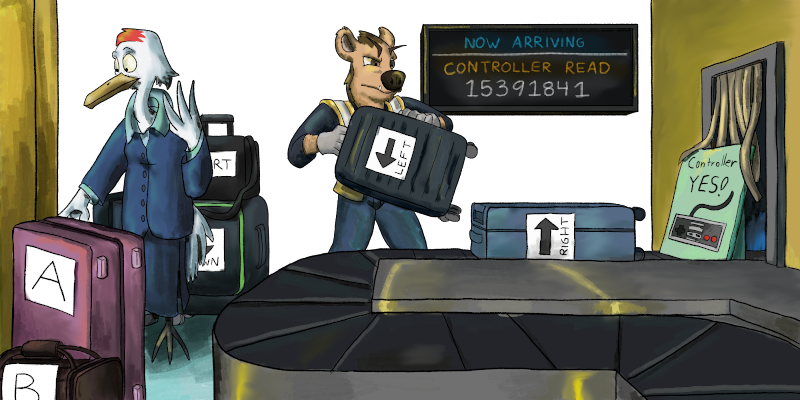
    Agents are putting together the suitcases to send along the conveyor belt.

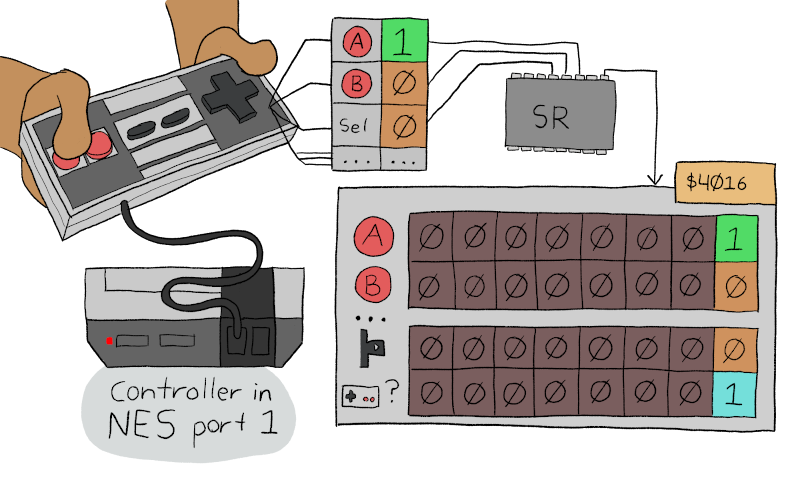
    The type of shift register the NES has is a parallel in, serial out shift register, which means the state of all 8 buttons is captured at the same time, and is then squashed down into a byte to send across the wire, one bit at a time in order. If the button is down, the corresponding bit sent via the shift register is a 1. Otherwise, it’s a 0. The button state is always sent in this order: A, B, Select, Start, Up, Down, Left, Right.

    A diagram of a single controller plugged into the NES

    On the other end, the NES shifts the first bit off of the shift register and onto the same memory location you used to start the process, replacing the lowest bit in $4016 with the bit from the register. Once you read a byte of data from $4016, the next value is shifted off of the register into the lowest bit of $4016 again. When reading button press state, the rest of the bits in $4016 are unused and can be ignored.

    This process continues until you’ve done 8 reads to $4016, pulling all the suitcases off of the carousel to work with in your code. Continuing to read from that memory address will tell you if a controller is hooked up or not to that controller port, to know if the data is trustworthy.

    A luggage agent is taking suitcases off the conveyor belt in order. There's a sign indicating these suitcases are from a rear controller.

    Since there are two controllers, there are two shift registers and two memory areas where data is loaded from. For most games, this is all you need. But you want to bump-set-spike that volleyball with three of your rad friends. How does the NES Satellite make four controllers work?

    The Four Score and Satellite connect the four controller shift registers to its own hardware, and the Satellite has its own shift registers that hook up to the NES controller ports via the infrared receiver. Your game asks for controller data the same way, by writing a 1, then a 0, to $4016, and the Satellite will pass this commmand along to the controllers plugged into ports 1 and 3 on the Satellite so they can start collecting button presses. The the game will start reading from the memory location like before, which is now being populated by the Satellite.
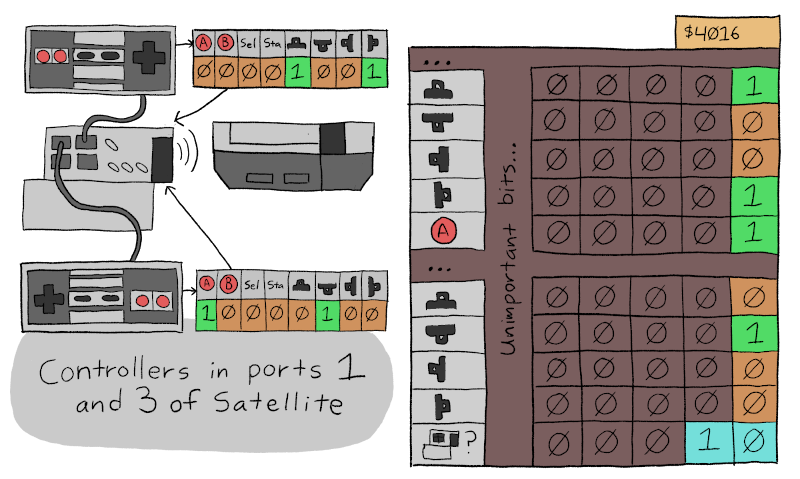
    A diagram of two controllers plugged into a Satellite.

    Instead of stopping at sending 8 bits though, the Satellite sends, in the case of the first controller port, the first 8 bits for the first controller, then the next 8 bits for the third controller. Then, it sends a magic 8 bit code (10 in this case) to let the game know that this data is coming from a Four Score or Satellite and that the four player mode is enabled. You can use these codes to detect if there is a Four Score or Satellite plugged in, allowing you to enable menu options to start 3- or 4-player games. Without a Four Score plugged in, for example, Super Spike V’Ball will show the 2 vs. 1 or 2 vs. 2 options in the main menu, but you can’t select them.
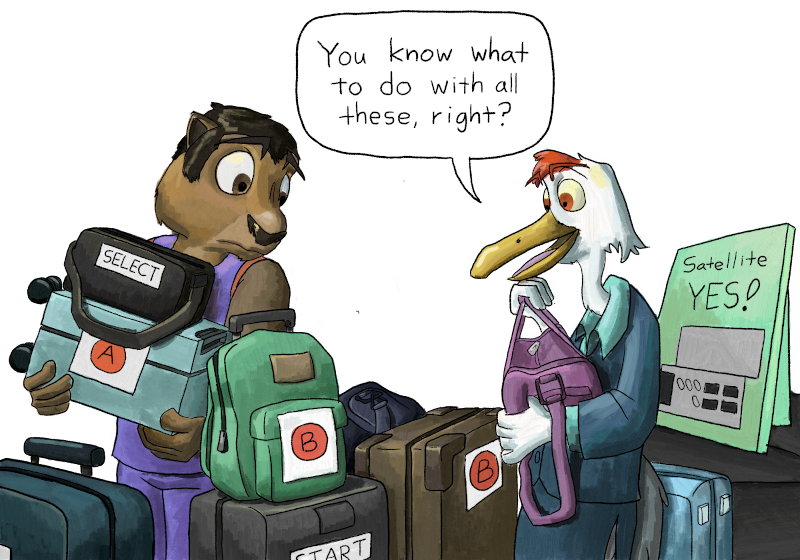
    A luggage agent is asking a volleyball player who is overflowing with suitcases if they know how to handle all of the suitcases.

    There were plenty of games made that supported the Four Score and Satellite, and this style of multitap continued on with the PC Engine and SNES. There were even directions in some later Amiga games for building a parallel port controller multitap from a printer cable for adding two more controller ports! Eventually, Bluetooth & other wireless connectivity and USB eliminated the need for what was essentially a clever hack on top of the existing controller systems to expand gameplay to more than the few controller ports early game consoles and computers had.

    Now avoid those campfires and set up for a power alley, and watch the line shot! Those are volleyball terms!

    Changelog
    • 2021-05-17: Initial post

    Self-Portrait April 2021

    April 22, 2021

    I chalked up a new Topaz self-portait for April 2021!

    April was a rough month and a lot of stuff got in my way when it came to doing art and writing for the site. I think I took the reference photo early in April but only now had the time and availability to finish it. New self portrait sometime in May!